Bonded screed | Price, DIY, Advice and Information
Screed floor construction 11 - Choose a different floor structure
1 cm to 5 cm - with concrete slab as substrate - non-moisture-sensitive floor covering such as tiles
Information
A bonded screed is applied to a concrete slab when you want to level your floor between 1 cm and 5 cm.
A bonded screed is bonded to the underlying floor slab and is always prepared with a bonding slurry or primer layer.
Before starting, the floor slab must be solid and free of cracks, and the surface must be dry, free of grease and dust.
Advantages
- Achieve a perfect end result without experience
- Compartmentalization of the screed = crack-free screed
- Screed is much cheaper than self-leveling compound.
- Spreading screed work over several days (no stress during placement)
- Replaces the steel reinforcement mesh = saving an average of 3 euros/m²
- Due to the low thicknesses, there is less weight on the supporting floor.
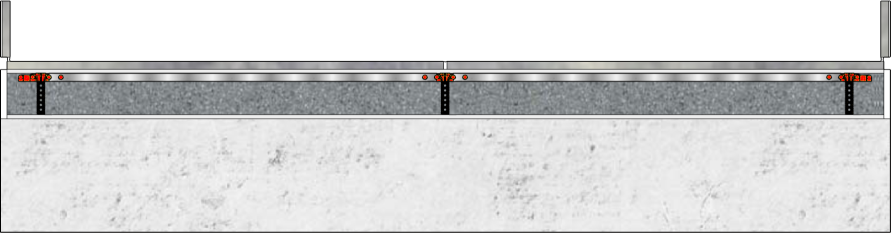
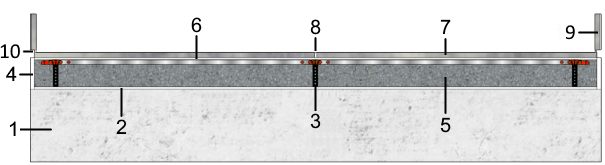
Side view of floor structure
Legend
- Concrete
- Bonding layer + optional epoxy primer against moisture
- Staenis bonded screed grid (thickness from 1 cm to 5 cm)
- Apply edge insulation if necessary
- Screed with 250 kg/m³ cement
- Double bonding with S1 Flex Tile Adhesive
- Non-moisture-sensitive floor coverings such as tiles
- Water-repellent, colored joint mortar
- Skirting board
- Flexible silicone
Introduction to Bonded Screed
Bonded screed is a popular flooring solution, used for leveling and stabilizing floors with a thickness between 1 cm and 5 cm. This article provides you with comprehensive information about bonded screed, including the price, DIY tips, advice, and other important information to help you make an informed decision.
What is Bonded Screed?
Bonded screed is a type of floor screed that adheres directly to the concrete substrate, creating a strong bond between the two surfaces. It is often prepared with a bonding layer or primer to ensure good adhesion. This type of floor is suitable for various applications and is an excellent choice for leveling and stabilizing uneven floors.
Why choose Bonded Screed?
There are several advantages associated with the use of bonded screed, such as:
- Achieving a perfect finish without prior experience
- Compartmentalization of the screed for crack-free results
- Lower costs compared to other leveling solutions
- The possibility to spread the work over several days
- Replacement of traditional iron reinforcement mesh, with an average saving of €3/m²
- Reduced weight on the load-bearing floor due to reduced thickness
Preparation of the substrate for Bonded Screed
To ensure a successful installation of bonded screed, it is crucial to properly prepare the concrete substrate. This includes:
- Ensure that the concrete is strong, stable, dry, clean, and free of dust and contaminants
- Removal of loose or damaged parts that may interfere with adhesion
- Temporarily disable any underfloor heating
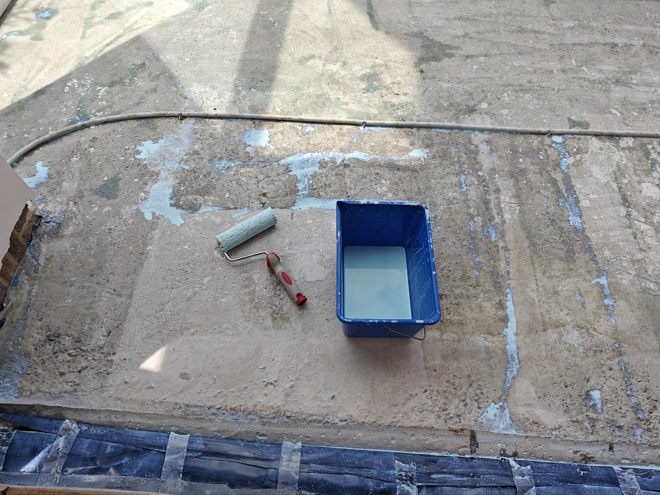
Applying a primer to the substrate
Applying a primer to the substrate is essential for a strong bond between the bonding screed and the concrete. There are various primers available, depending on the specific needs of your substrate. For example, use a primer for absorbent surfaces, such as Primer CodeX FG 300, on dry concrete and a bonding primer for non-absorbent surfaces. In case of slight moisture problems, use an epoxy primer such as UZIN PE 460 A/B. Always consult technical datasheets for guidance when dealing with damp or contaminated substrates.
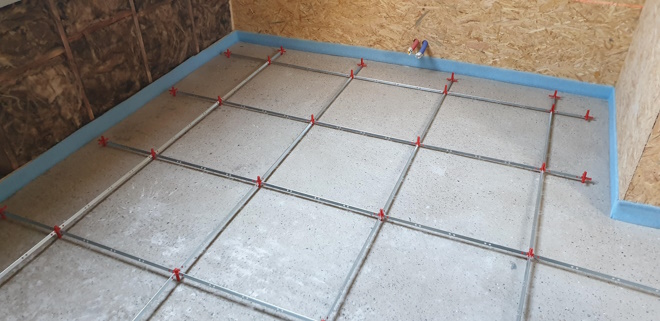
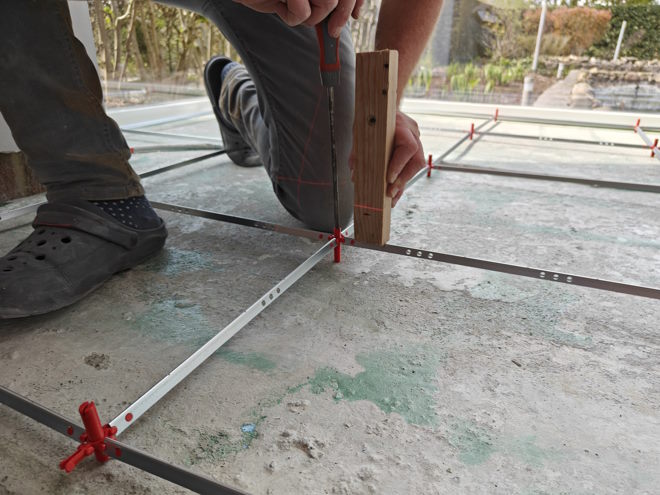
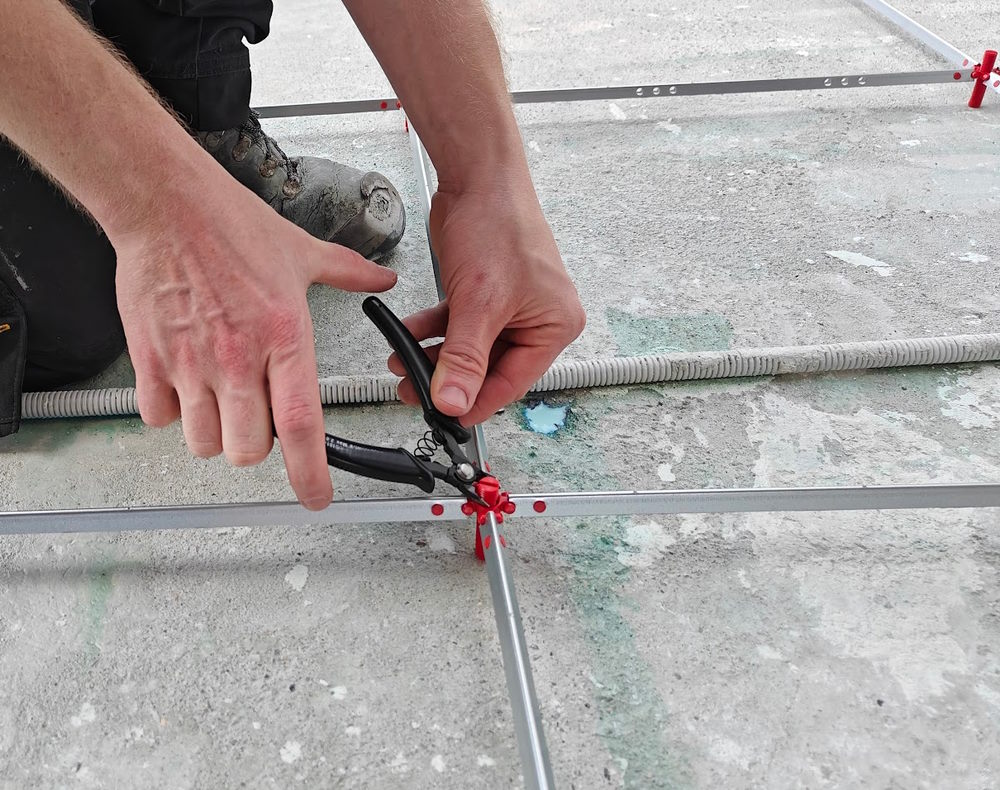
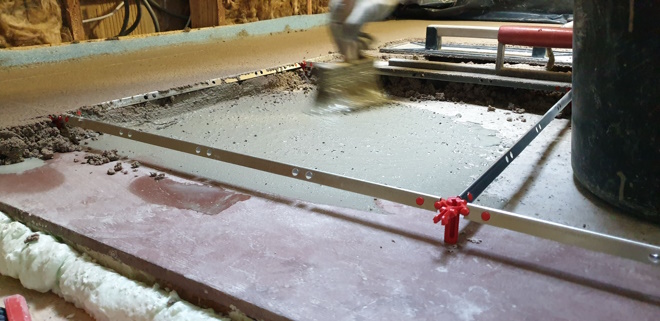
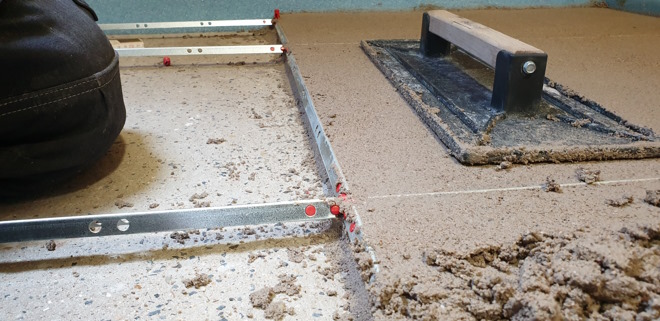
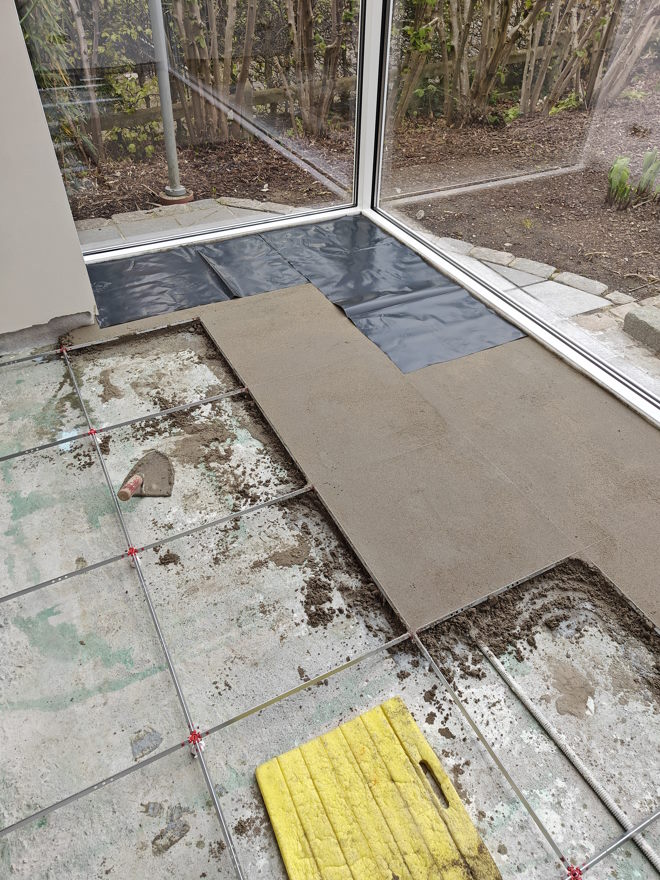
Installing the Staenis Leveling Grid
The StaenisGrid leveling grid is a unique leveling grid that helps create a perfectly flat surface for the bonding screed. This innovative system allows you to start with a thickness of just 1 cm, ensuring a precise and efficient installation. Follow the guidelines for setting up the grid and adjusting it to the correct height.
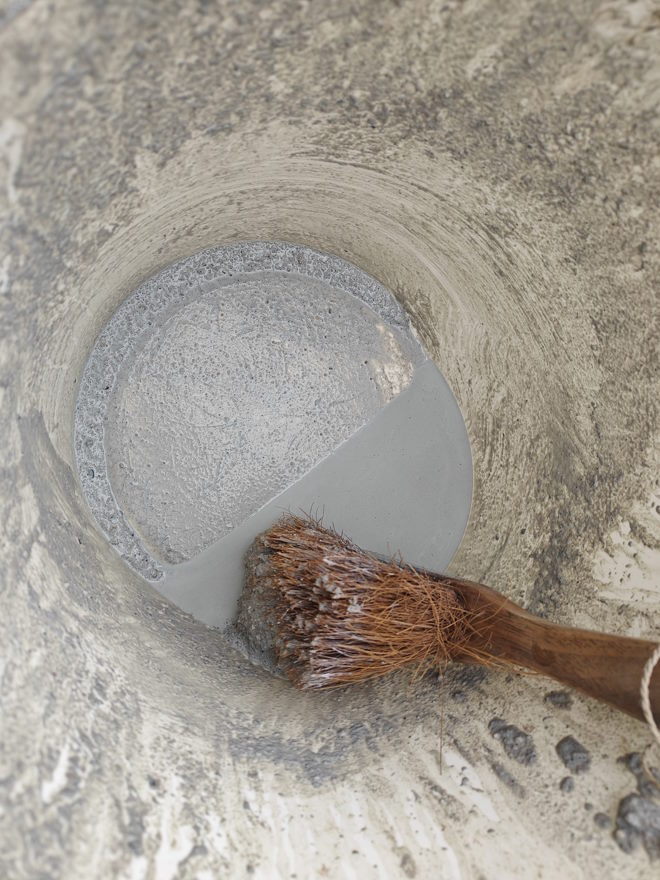
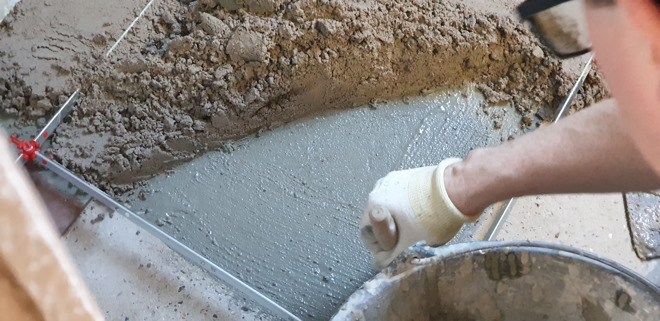
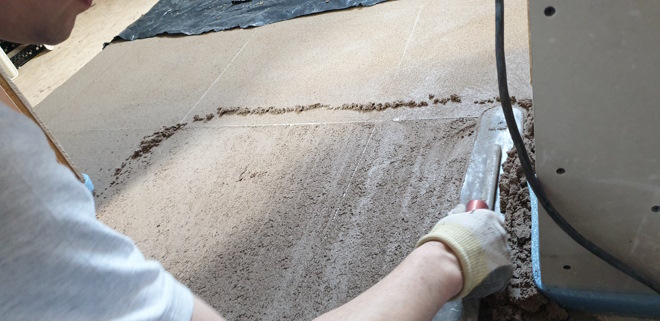
The preparation and application of the Barbotine (Cement slurry)
The barbotine, also known as cement slurry or cement paste, is a crucial component for achieving a strong bond between the bonding screed and the concrete substrate. Mix the barbotine according to the recommended ratios and apply it to the prepared substrate with a brush. Apply the screed mixture while the barbotine is still wet for optimal adhesion.
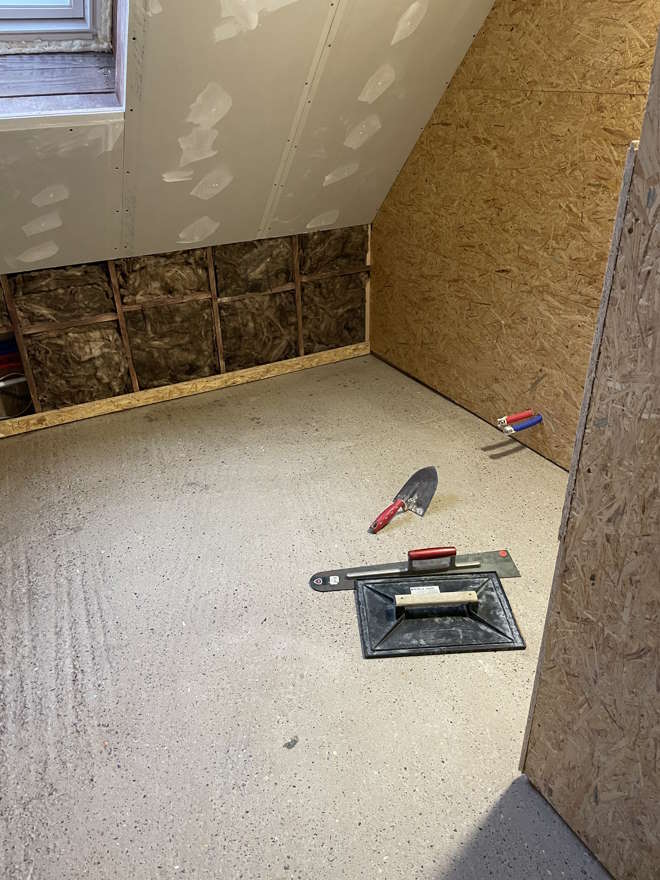
Laying the Bonded Screed
Once the slurry has been applied, you can start laying the bonding screed. Spread the screed mixture evenly over the surface, using the StaenisGrid leveling grid as a guide to achieve the desired thickness. Make sure to apply the screed mixture while the slurry is still wet to prevent detachment and hollow sounds.
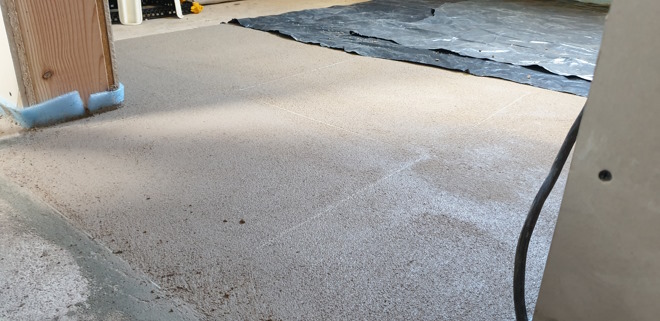
The curing and drying of the Bonded Screed
After applying the bonding screed, it is important to allow it to cure and dry properly. This ensures a stronger and more stable floor. Cover the freshly applied screed with a foil to prevent it from drying out and hardening too quickly. Take the recommended drying time into account before proceeding with the next steps.
Finishing of the Bonded Screed
When the screed is fully cured and dried, you can finish the floor with tiles or other floating floor coverings. Use double bonding with S1 Flex Tile Adhesive for optimal adhesion. Also make sure to use a water-repellent, colored grout to protect the tile joints.
If there is a risk of rising damp from the subfloor, it is important to take precautions when installing floor coverings. You can use tiles or vapor-permeable floor coverings to minimize moisture problems. If necessary, you can also seal the subfloor to prevent moisture from penetrating.
When installing laminate, it is a good idea to first apply a foil to serve as a moisture barrier. After that, you can install the underlay and then the laminate.
Skirting boards and joint finishing
Don't forget to install skirting boards to neatly finish the edges of the floor and to apply a smooth silicone joint where the floor meets the wall. This helps to keep moisture out and ensures a professional finish.
Conclusion
Bonded screed is an excellent choice for leveling and stabilizing floors between 1 cm and 5 cm thick. With proper preparation, the use of a StaenisGrid leveling grid, and by following the recommended installation and finishing methods, you can create a durable and attractive floor. With the tips, advice, and information on this website page, you are well on your way to achieving a successful bonded screed installation.
Installation video
Placement of StaenisGrid
Placement of screed
Installation of screed with height variation
We deliver screed in a silo to your home (only in Belgium)
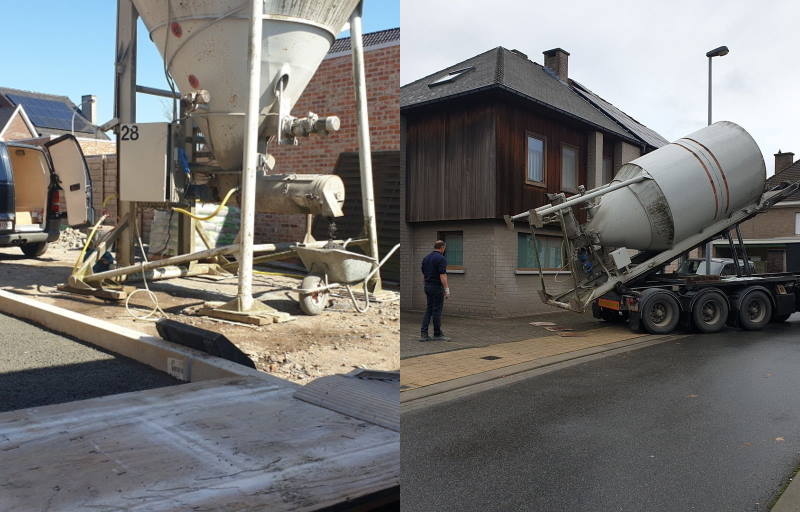
With a simple press of the button on the silo, you can produce fresh sand-cement screed at a rate of 3 m³/h, and this without time pressure to process the large quantity of sand-cement screed.
There are actually 2 separate compartments in the silo. One part is filled with sand (0/4-0/7mm) and the other part is filled with dry cement (250kg/m³). These are only mixed with water at the moment you wish.
The big advantage of this is that you can make fresh sand-cement screed at your own pace and for several weeks.
We deliver screed in bags to your home
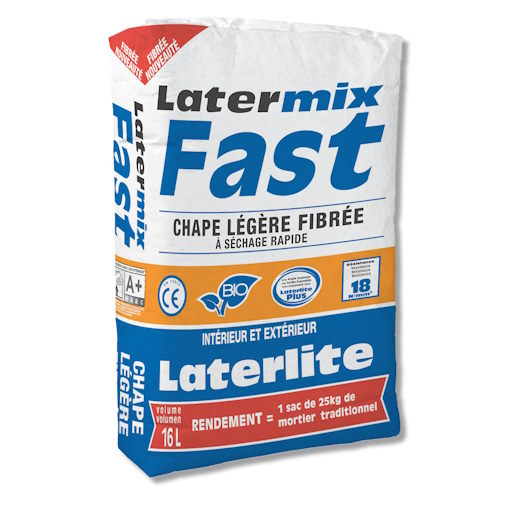
Fast: Fast-drying, fiber-reinforced screed with only 2/3 of the weight compared to traditional screed. This makes the work significantly less heavy when working with bagged material instead of traditional screed. Ideal for applying a bonded screed floor or for small spaces, both indoors and outdoors. This Fast screed is easy to spread, allowing you to achieve a flat finish more quickly.