Step-by-step guide for self-installation of a terrace
By Staenis | | Manual
To install a high-quality terrace, you need to take into account moisture, stresses, heights, etc. Using the step-by-step plan below, we will explain how to proceed on solid ground, on a concrete slab, or both.
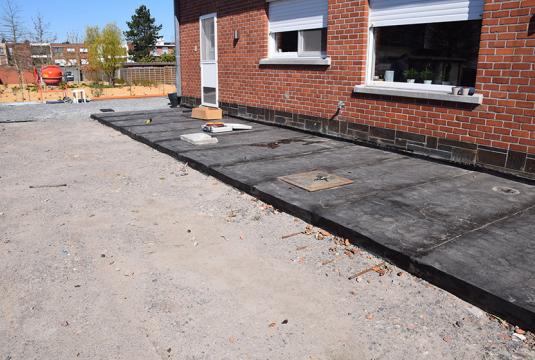
Preparing the substrate
Concrete slab
- Cleaning the concrete slab.
- Check whether the concrete slab has been placed with enough slope. This is important so that the water can drain away. If this is not the case, cut grooves into the concrete so that the water can always drain away everywhere. It is also possible to first install a sloped screed (e.g. from 1 to 5 cm thick without reinforcement mesh and with a slope of 1 to 2%) with a waterproofing membrane or sealing paste on top.
- Check whether you have at least 5 cm of build-up height (height of the Staenis grid) everywhere.
Open ground, gravel, ...
- Excavate the subsoil so that you have 10 to 20 cm of height left for compacted crushed concrete, 7 to 8 cm of height for the screed or drainage mortar floor, and tile adhesive + tile thickness.
- Placing drainage pipes that discharge into the sedimentation pits or drain.
- Now, if desired, place the curbstones. Create a subbase of 5 cm compacted crushed concrete, and place the curbstones at the correct height and secure them with stabilisé.
- Place the 10 to 20 cm of concrete rubble in multiple layers and compact it each time. This way, you avoid subsidence afterwards. This concrete rubble provides a pressure-resistant subbase and must be permeable to water.
- Level this out if necessary with a thin layer of screed, so that you effectively have 7 to 8 cm everywhere, taking into account the slope of 1 to 2% (1 to 2 cm slope per linear meter).
Concrete slab in combination with soil, gravel, ...
- Perform the above steps
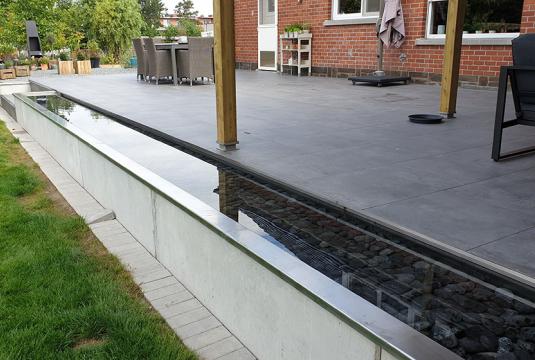
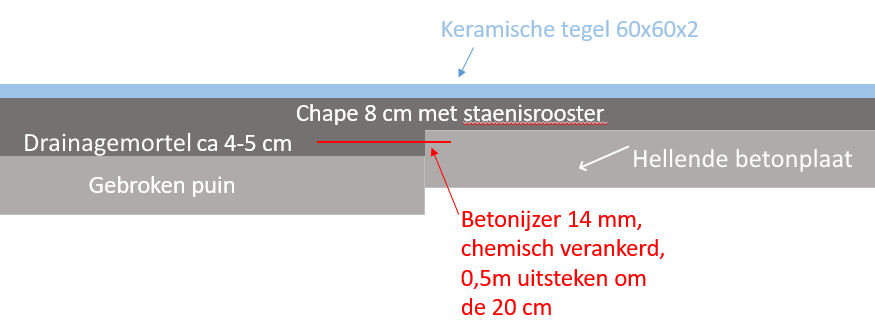
- Drill and install chemical anchoring of rebar with a diameter of 14, every 20 cm, and let it protrude 50 cm at the side of the concrete slab. This prevents a crack line from forming there afterwards.
Choose between drainage mortar or screed
Concrete slab/ramp screed with waterproofing
Because a concrete slab does not let water through and a screed absorbs moisture, in this situation you are required to replace the screed with a draining mortar. This consists of porphyry 02/06 stones, mixed with cement, and is available in a silo at Staenis.
Concrete rubble
With a permeable subfloor, you have the choice between screed, available in a silo from Staenis, or drainage mortar to create your floor screed. Drainage mortar significantly extends the lifespan of the terrace. With drainage mortar, you avoid the screed freezing and becoming sandy.
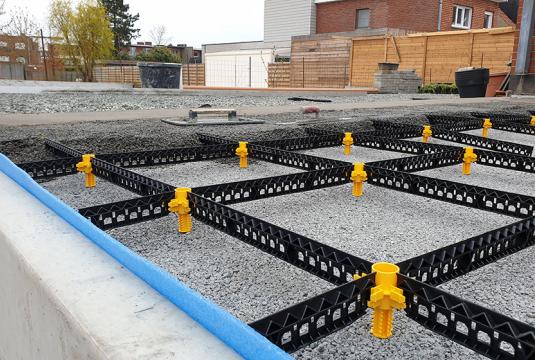
Placing Staenis grid
Place and adjust the Staenis grid at a height of 7 to 8 on the already sloped substrate. Determine the correct height of a leg every 3 m with a laser and place a long straightedge on it or use a string. This way, you can easily adjust the intermediate legs to the correct height with a screwdriver. Ensure a slope of 1.5 to 2 cm per running meter (depending on the roughness of the tile surface).
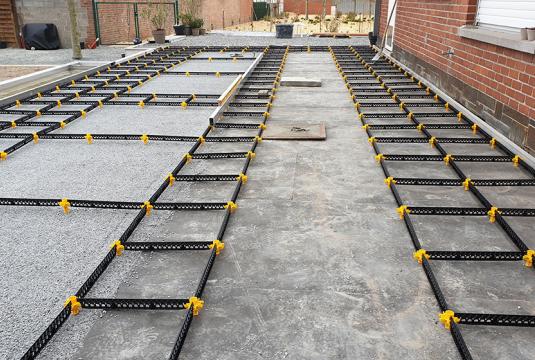
Place edge insulation along the walls and secure it with a bit of screed or drainage mortar. This is a foam strip that will absorb the stresses in the screed.
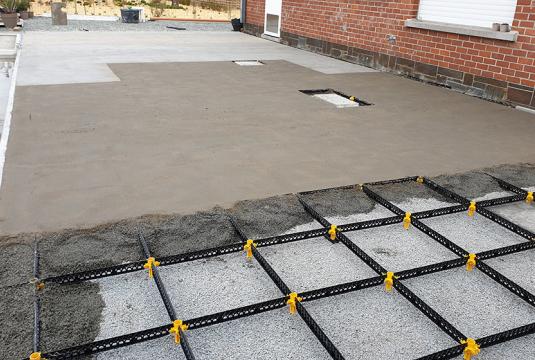
Installation of terrace screed
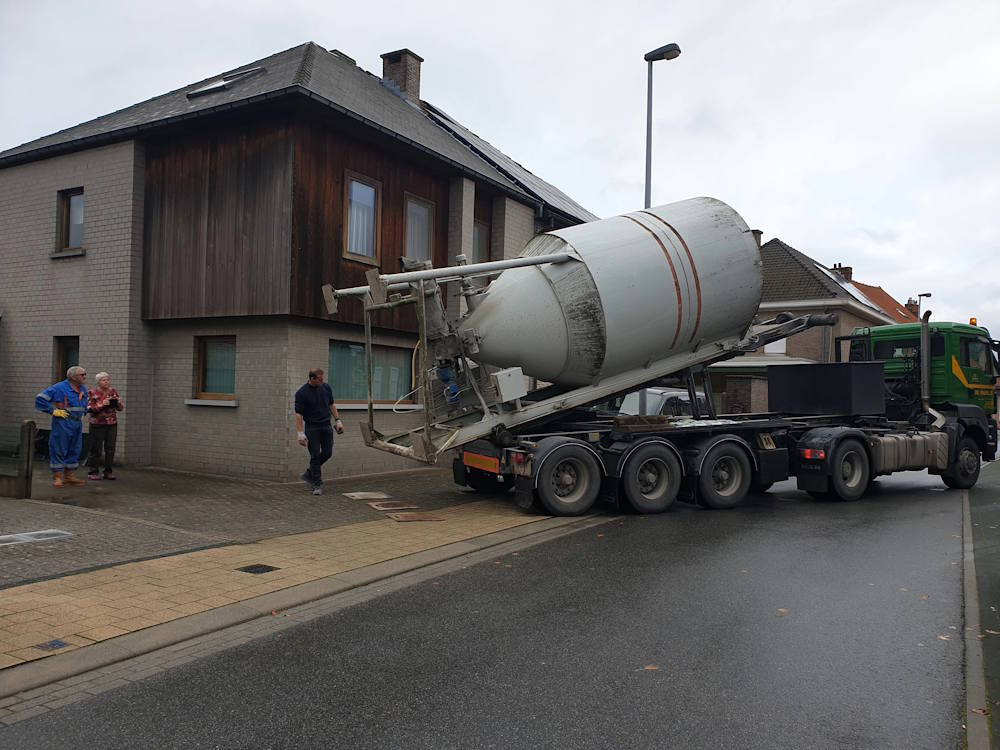
Have a drainage mortar or screed silo delivered. This contains a total of approximately 20 tons of cement and sand/porphyry loaded dry. You can decide yourself when to prepare a wheelbarrow of screed mortar. With a silo, you always have the correct mixing ratio and the work is much less labor-intensive.

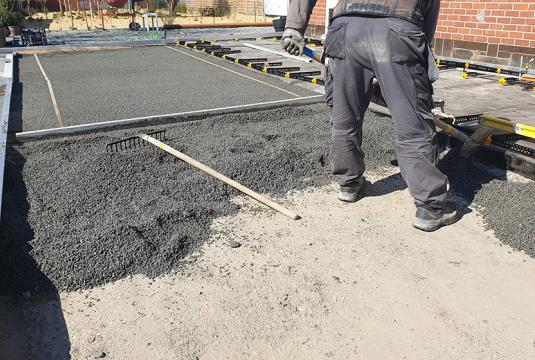
Drainage mortar
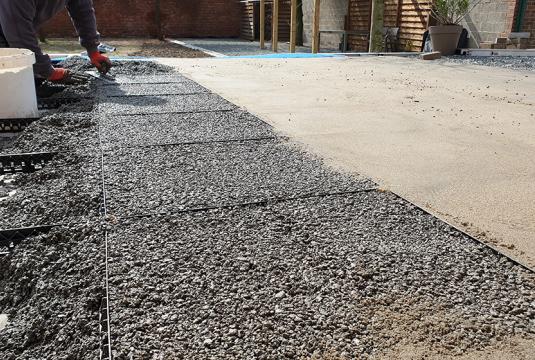
- Start by pouring the drainage mortar onto the legs. This way, the height adjustment of the grid remains correct. Then fill each compartment completely with drainage mortar.
- Level the drainage mortar with a large screed bar (60 cm length) on the grate.
- You take a bucket of screed, with a ratio of 5 parts washed sand to 1 part cement (mix well + a little water). Sprinkle this (a thin layer of a few mm) over the freshly placed drainage mortar (wet on wet) and level it with a float and large screed trowel until the surface is nice and even, at the same height as the top of the grid. This is easily achieved by using the installed Staenis grid. This top layer serves as a bonding layer for the later tiling work.
Screed
- Start by pouring the screed onto the legs. This way, the height adjustment of the grid remains correct. Then fill each compartment completely with screed and press it down a bit with a trowel.
- Level the screed with a large screed straightedge (60 cm length) on the grid.
- Polish this with a large sanding board and screed trowel. This ensures that the remaining holes are filled and good adhesive strength to the tile is guaranteed.
Thanks to the grid, you can stop working whenever you want. To do this, you simply finish one compartment completely and leave the rest for next time.
Now that the drainage mortar/screed floor has been installed, everything is ready for tiling. By installing the Staenis grid, the waiting time to continue working is much shorter (14 days). This grid eliminates all stresses in the screed and prevents curling. Thanks to the drainage mortar, there is no need to lay a drainage mat anymore, which saves you money and time.
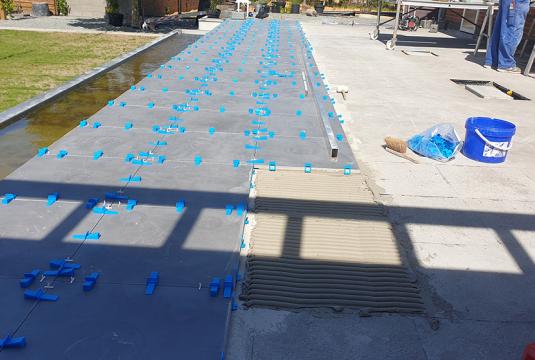
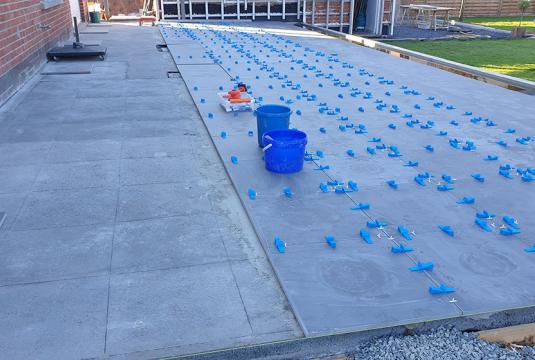
Placement of terrace tiles: if you do not have a layout plan for the tiles to be installed, lay out the necessary rows of tiles yourself to minimize the number of tiles that need to be cut and to place them as aesthetically as possible. Tiles should always be double-glued with a 15 mm notched trowel on the screed and leveled on the tile to achieve an adhesive thickness of approximately 5 mm. Also use a levelling system when installing the 2 cm thick tiles and spacers for a joint width of 3 - 10 mm. Now let the terrace and tile adhesive rest and dry for approximately 14 days; this will eliminate all tensions in the substrate.
Grouting tile work: this can be done with a mixture of sand and cement, but for modern tiles you should use pre-made grout. This improved grout adheres better to the sides of the tiles and lasts longer. You prepare the grout with the correct amount of water and manually press it into the joints. Later, you can wash them off one by one with a sponge and a sponge bucket. Be careful to add as little water as possible so that the color pigment is not lost.
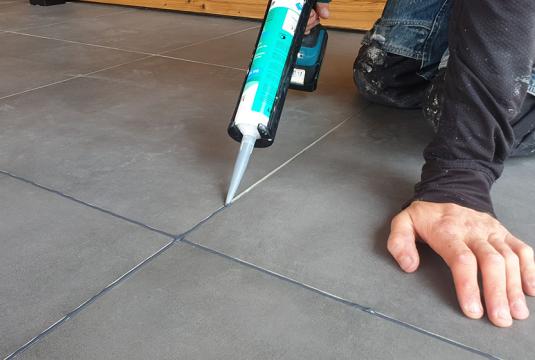
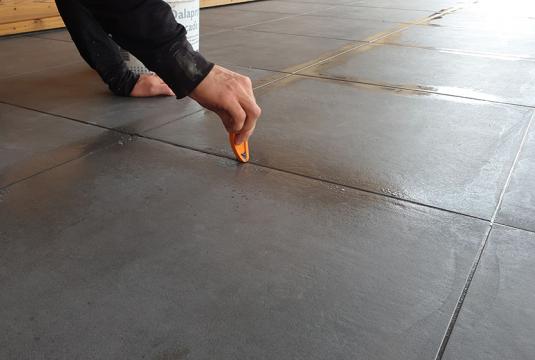
You can also seal all joints or expansion joints with an elastic polymer joint with cement look. This makes the joints flexible and they do not discolour due to rain. The purchase is more expensive than the traditional method with grout, but you win this double and thick in time and intensive labour. Each tile is surrounded by elastic grout, so that cracks in the grout are non-existent, unlike standard grout. Everything can be walked on after 24 hours.