Manual and important points of attention for the Staenis grid:
Drainage mortar for terraces
Processing temperature
Only install drainage mortar and screed at temperatures between 10°C and 20°C, as this ensures that the surface will not become sandy or come loose. Also make sure that the drainage mortar and screed feel cool/cold during installation and that the ambient temperature does not drop below 5°C.
Installation methods
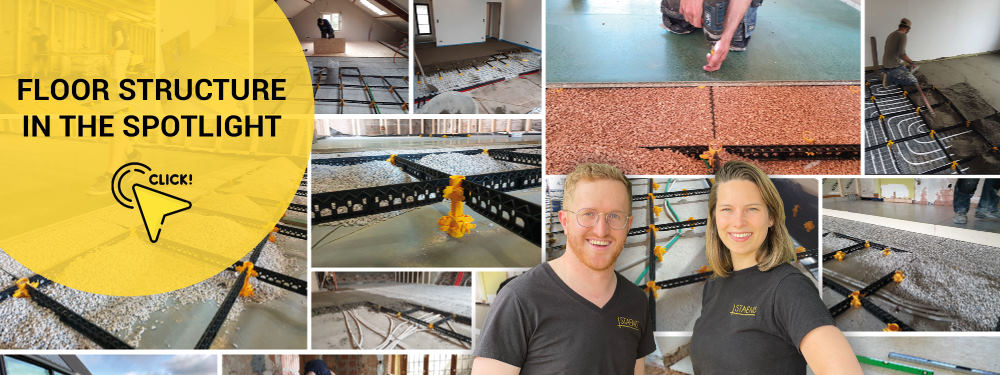
There are 2 different installation methods to install the grid in your space.
- Row by row: Place a row of StaenisGrids - Rotate the StaenisGrid to the correct height - Fill the StaenisGrid with drainage mortar and screed - Level it to the top of the grid - Repeat until the entire area is finished.
- Pre-installed: Place all StaenisGrids - Rotate all StaenisGrids to the correct height - Fill the StaenisGrid with drainage mortar and screed - Level it to the top of the grid - Check the height of the grid - Repeat until the entire area is finished.
Permitted floor coverings
- Tiles (ceramic tiles and natural stone)
Expansion joints
-
Surfaces without expansion joints may not exceed 200 m².
For surfaces larger than 200 m², please contact us. - Edge insulation (perimeter joints) still needs to be installed.
Processing
- The drainage mortar can be applied at different times, as the drainage mortar is interrupted by the grids. However, always click the next row of grids into place to prevent the drainage mortar from drying out in the click system, which could cause the click system to no longer function properly.
- The grid must be clicked together over the entire surface. If this is not possible, an expansion joint must be placed between the two surfaces with grids.
- The grid must be placed no more than 5 cm from the wall at all points in order to maintain the benefits of the StaenisGrid. If this is not applied correctly, no guarantee can be provided.
Secure the grids by placing weight in or on a compartment. Click a row of slats out of the grid to allow passage with a wheelbarrow. Because the grid is fixed, the spacing will remain the same after separating the row of slats.
Placement of StaenisGrid
- Place the frames by clicking the slats and legs together.
- Shorten the slats at the wall by sawing or grinding them. The maximum distance from the grid to the wall is 5 cm.
- At the connection to the wall, you can stabilize the grid by clicking legs sideways into the slat. At both ends of the slat, a third type of click connection can be seen. This allows you to connect two slats with a sideways leg to each other using a slat. Note that the slat then only clicks in one direction.
- Raise or lower the StaenisGrid with a screwdriver by turning the adjustment screw to the left or right.
Height adjustment
The highest flatness can be achieved with a laser that you align with a line on a wooden tool/lat or folding ruler. Once you use a digital receiver, the screed will inevitably cause height differences of a few millimeters. A digital water level hose is also not recommended. Try to use a digital receiver or water level hose only to mark out a few points, so that you can level everything in between using a stretched string or aluminum straightedge.
Accuracy
We ask you to pay close attention to the height adjustment during installation and to regularly check the flatness with a long aluminum straightedge or laser.
Placement of drainage mortar
- Fill the StaenisGrid with drainage mortar and place it just slightly higher than the top surface of the grid. Try to lightly press the drainage mortar with your trowel or long screed bar.
- Take a long screed bar or aluminum straightedge and drag all the excess drainage mortar off the grate. This way, it is now level with the top surface of the grate.
- Sprinkle screed by hand onto the surface and rub it in with a large float. This will ensure that all irregularities are filled in. Be sure to check that you do not create any dips or bumps in the compartment and always keep it level.
- For extra adhesion and flatness, take the screed iron again and polish the screed by holding the screed iron slightly tilted (3 degrees up) and rubbing it over the surface.
- Check and correct each cell for flatness to avoid hollows in the grid. This is a very important step that must be carefully observed.
* Only manually press/finish the drainage mortar and screed with a screed trowel and compact with a large float. Do not press it with your feet, as this can cause height differences.