Manual and important points of attention for the Staenis grid:
Load-bearing dry fillers, finished with OSB or Durelis panels
Installation method
-
Pre-positioned:
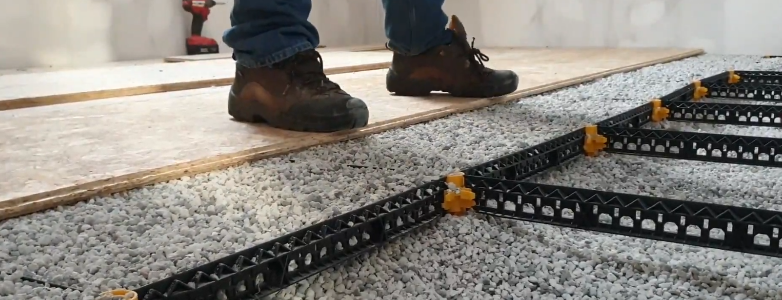
- Place all Staenis grids in the room
- Adjust all Staenis grids to the correct height
- Glue the Staenis pots with PU foam
- Fill the Staenis grid with dry fillers
- Level the dry fillers on top of the rack.
- Place an OSB or Durelis board on the framework and screw it in place.
- Check the height of the grid
- Repeat until the entire space is finished
* Dry fillers are so light that you can easily walk over the grid with a filled tub/bag of dry fillers and pour them into the Staenis grid.
Placement of Staenis grid
- Place 2 rows of racks parallel to the wall by clicking the slats and legs together.
- Shorten the slats at the wall by sawing or grinding them. The maximum distance from the grid to the wall is 5 cm.
- At the connection to the wall, you can stabilize the grid by clicking legs sideways into the slat. At both ends of the slat, a third type of click connection can be seen. This allows you to connect two slats with a sideways leg to each other using a slat. Note that the slat then only clicks in one direction.
- Raise or lower the Staenis grid with a screwdriver by turning the adjustment screw to the left or right.
Height adjustment
The highest flatness can be achieved with a laser that you align with a line on a wooden tool/lat or folding ruler. Once you use a digital receiver, the dry fillers will inevitably cause height differences of a few millimeters. A digital water level hose is also not recommended. Try to use a digital receiver or water level hose only to mark out a few points, so that you can level everything in between using a stretched string or aluminum straightedge.
Accuracy
We ask you to pay close attention to the height adjustment during installation and to regularly check the flatness with a long aluminum straightedge or laser.
Placement of dry fillers
- Fill the Staenis grid with dry fillers, compact these granules, and place them just one mm higher than the top surface of the grid.
-
In the photo, you can see the Staenis grid filled with cellular concrete granules. The left compartment is insufficiently filled and will offer little load-bearing capacity, causing a single board to bend slightly. The right compartment is nicely filled and compacted, resulting in a perfect and solid outcome.
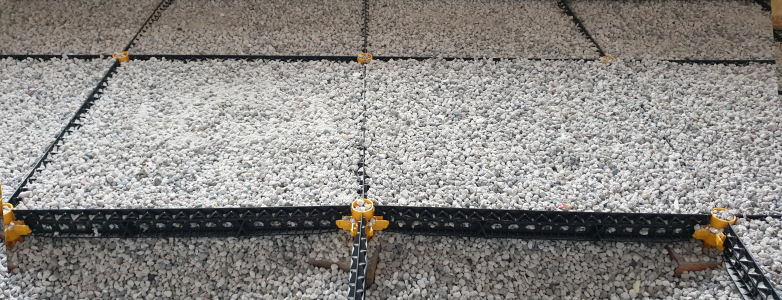
- Check and correct each cell for flatness to avoid cavities in the grid.
-
Place directly, row by row, at least 22 mm thick OSB on this. Apply double boarding if extra strength is required.
-
Screw the wooden board into the slats of the Staenis grid. Use screws with a thickness of 3.5 to 4.5 mm, 2 cm longer than the thickness of the board, and with a self-drilling head.